Imagine a kitchen where every pot and pan has its place, easily accessible, and adds a touch of rustic charm or modern elegance. For many, that vision is hampered by limited cabinet space or an unconventional kitchen layout, especially one with a striking sloped or vaulted ceiling. However, a pot rack is a game-changer, not only freeing up valuable storage but also becoming a central design feature. Don’t let your unique ceiling architecture deter you; installing a pot rack on a sloped ceiling is entirely achievable with the right approach, tools, and a bit of DIY confidence. This comprehensive guide will walk you through every step, ensuring your pot rack is securely installed and perfectly level, transforming your kitchen’s functionality and aesthetic.
Why a Pot Rack is a Game-Changer for Your Kitchen
A pot rack offers far more than just storage; it’s a multifaceted solution that elevates your kitchen experience. Firstly, it frees up cabinet space, instantly decluttering lower cabinets and making room for other essentials. This is particularly beneficial in smaller kitchens where every inch counts. Secondly, it organizes cookware efficiently, keeping your pots, pans, and lids neatly arranged and preventing the frustrating clang and clatter of searching through stacked items.
Thirdly, pot racks provide easy access to your most-used cooking tools. No more bending and rummaging; your essential cookware is right at your fingertips. Finally, a well-chosen pot rack can add significant aesthetic appeal to your kitchen. Whether it’s a sleek modern design, a traditional wrought iron piece, or a rustic wooden frame, it serves as a stylish focal point, showcasing your cookware as part of your decor.
Understanding Pot Rack Types
While the focus here is on ceiling-mounted pot racks for sloped ceilings, it’s helpful to understand the various types available and why a ceiling-mounted option is often the best fit for such architectural features.
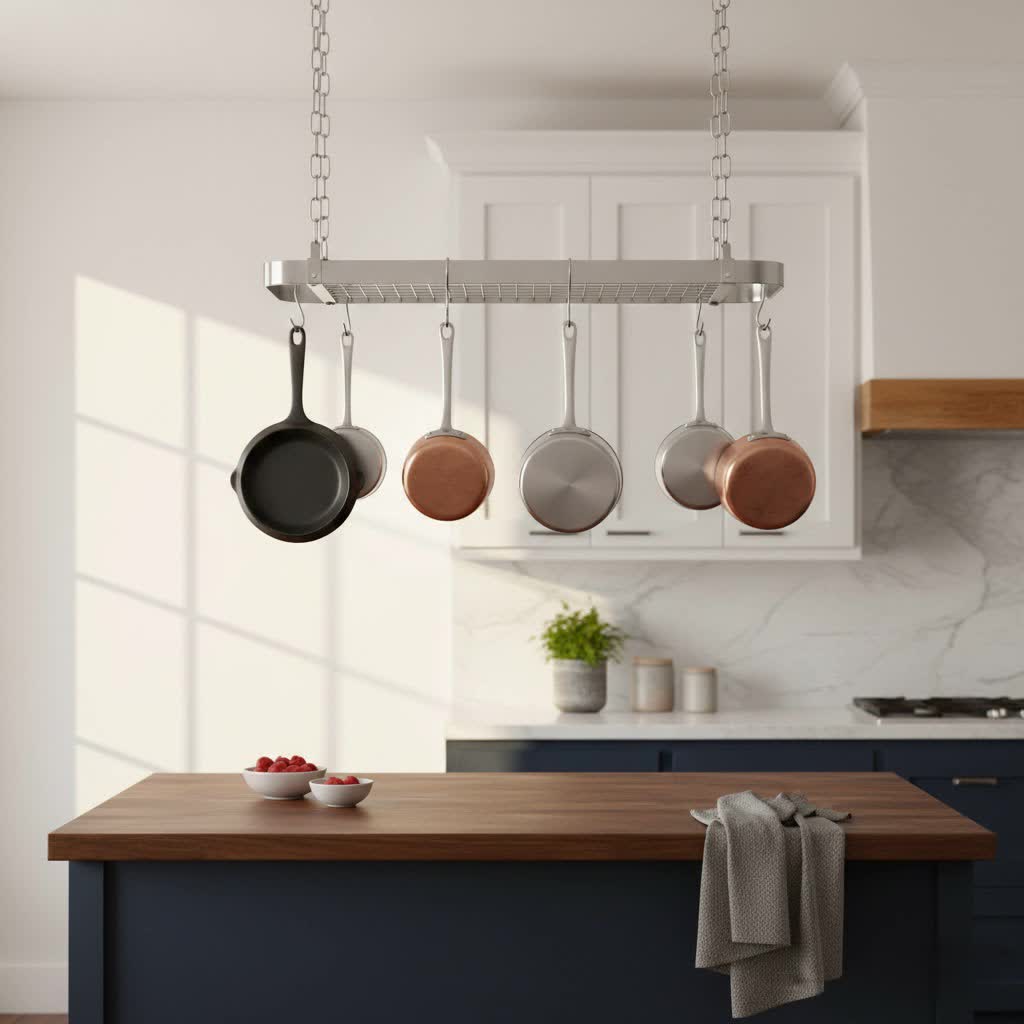
- Ceiling-Mounted Pot Racks: These are suspended from the ceiling by chains or rods. They are ideal for sloped and vaulted ceilings because the suspension system can be adjusted to accommodate varying heights, ensuring the rack hangs level. They offer high capacity and make a strong visual statement, often becoming the centerpiece of the kitchen.
- Wall-Mounted Pot Racks: These attach directly to a wall. While great for saving space on straight walls, they are generally unsuitable for sloped ceilings unless the rack is positioned on a flat wall beneath the slope. Their capacity can be more limited than ceiling versions.
- Freestanding Pot Racks: These are floor-standing units that do not require installation. They offer flexibility in placement and are perfect for renters or those who prefer not to drill into ceilings or walls. However, they take up valuable floor space and typically have less storage capacity than ceiling-mounted options.
- Corner-Mounted Pot Racks: Designed to utilize corner spaces, these are typically wall-mounted and offer a smart solution for maximizing often-underused areas. Like other wall-mounted options, they are not directly applicable to a sloped ceiling unless mounted on a vertical wall section.
Comparing Pot Rack Types
Choosing the right pot rack depends on your specific kitchen layout, storage needs, and aesthetic preferences. For a sloped ceiling, the ceiling-mounted option truly shines.
| Feature | Ceiling-Mounted | Wall-Mounted | Freestanding |
|---|---|---|---|
| Pros | High capacity, aesthetic focal point, adaptable for sloped ceilings, frees up floor and cabinet space | Space-saving on walls, easier installation, good for small kitchens | Flexible placement, no permanent installation, good for renters |
| Cons | More complex installation, requires ceiling support, heavier items can be hard to reach | Limited capacity, not suitable for sloped ceilings, requires clear wall space | Takes up floor space, often lower capacity, less secure than mounted options |
| Best For | Large kitchens, sloped or high ceilings, extensive cookware collections, those seeking a design statement | Small kitchens, limited overhead space, those with robust wall studs | Renters, kitchens with ample floor space, those needing temporary storage solutions |
| Cost | Mid to High | Low to Mid | Low to Mid |
Essential Tools and Materials for Installation
Before you begin, gather all the necessary tools and materials. Having everything on hand will ensure a smooth and efficient installation process.
- Your Pot Rack Kit: This typically includes the rack frame, chains (or rods), S-hooks for hanging pots, and ceiling mounting hardware.
- Stud Finder: Absolutely crucial for locating ceiling joists or studs, which provide the structural support needed for a heavy pot rack.
- Electric Drill: With various drill bits appropriate for pilot holes and screwing in hooks.
- Heavy-Duty Screw Eyes or Ceiling Hooks: Ensure these are rated for the combined weight of your rack and cookware. If your kit doesn’t include robust options, purchase them separately.
- Lockable Links (Optional but Recommended): These provide extra security by closing around the chain and screw eye, preventing accidental disengagement.
- Tape Measure: For accurate measurements of your space and rack.
- Pencil: For marking locations on the ceiling.
- Cardboard Template: A piece of cardboard or paper to create a visual guide for mounting points.
- Spirit Level or Laser Level: Essential for ensuring your pot rack hangs perfectly horizontal.
- Safety Glasses: Always protect your eyes when drilling.
- Sturdy Ladder: For safe access to your ceiling.
- Wire Cutters/Pliers: For adjusting chain lengths.
- Assistance (Optional but Recommended): An extra set of hands can be invaluable for holding the rack or template.
Step-by-Step Guide: Installing Your Pot Rack on a Sloped Ceiling
Installing a pot rack on a sloped ceiling requires careful planning and execution, primarily to ensure it hangs level despite the angle of the ceiling.
1. Preparation is Key: Choosing Location and Pot Rack
|
Our Picks for the Best Pot rack in 2026
As an Amazon Associate I earn from qualifying purchases.
|
||
| Num | Product | Action |
|---|---|---|
| 1 | CHOEZON 31.7-Inch Hanging Pot Rack, Space-Saving Pot Hanger for Kitchen, Ceiling Pan Hanging Rack with 16 Detachable S Hooks, Sturdy Metal Frame, Industrial Style, Rustic Brown and Black TPR09BF |

|
| 2 | MUDEELA Pots and Pans Organizer Rack for under Cabinet, Expandable 11.81''-22.85'' Pot Lid Kitchen Cabinet Organizer Holder with 10 Adjustable Compartment Cutting Board Organizer for Pan Lid, Bakeware |
|
| 3 | ORDORA Pots and Pans Organizer for Cabinet 16.61 Height, 8 Tier Pot Organizers Rack with 3 DIY Methods, Adjustable Pan Organizer under Cabinet Kitchen Organization and Storage |
|
| 4 | HULISEN Pots and Pans Organizer Under Cabinet, Expandable 2-Tier Pots and Pans Lid Storage Rack Holder with 10 Dividers, Adjustable Height Under Sink Organizer, Maximize Kitchen Storage Space |
|
| 5 | MUDEELA Pots and Pans Organizer Rack under Cabinet 14.55in Height, 8-Tiers Adjustable Pot Rack with 3 DIY Methods, Pot Lid Organizer inside Cabinet for Kitchen Pantry Organization and Storage |
|
| 6 | MUDEELA 8-Tier Pots and Pans Organizer under Cabinet, 15.83" Height Heavy Duty Pot Pan Organizer Kitchen Cabinet Organization and Storage, Adjustable Pot Rack for Frying Pan, Cast Iron Skillet, Black |
|
| 7 | VyGrow 28 Inch Pot Rack Wall Mounted, 2 Tier Pots and Pans Organizer with 20 Hooks and 6 Pot Lid Holders, Heavy Duty Steel Pot and Pan Hanger for Kitchen Cookware Utensils Storage 34.7" Lx13 Wx26.4 H |
|
| 8 | CHOEZON Pot Racks, 6-Tier Cookware Stand, Triangle Shelf Storage Tower for Kitchen, Pans Pots Storage Rack, Metal Wire Shelf Organizer, Corner Shelf, for Kitchen, Living Room, Black TPR15BB |
|
| 9 | ORDORA Pots and Pans Organizer: under Cabinet, 20.8" Height Heavy Duty 120LBS Pots Pans Organizer Rack for under Cabinet 8-Tier Adjustable for Big Stockpots, Dutch Oven, Cast-iron Pans, Heavy Cookware |
|
| 10 | CHOEZON Pots and Pans Organizer Rack, Kitchen Bakers Rack, Multi-Tier Storage Shelf, Kitchen Island Table, Cooking Rack with Pots and Pans Storage, Rustic Brown and Black TPR60BF |
|
First, select the ideal location for your pot rack. Consider visibility, ease of access to your stove or island, and ensure ample head clearance so you don’t bump into it. Measure the area to determine the appropriate size of your pot rack. It’s important to select a pot rack designed to be suspended by chains, as these offer the flexibility needed for a sloped ceiling. Ensure the rack’s weight capacity is suitable for your collection of pots and pans.
2. Locate Ceiling Joists (Crucial for Security)
This is the most critical step. Pot racks, especially when loaded with cookware, are heavy. They must be securely mounted into ceiling joists (also known as studs or rafters), not just drywall. Drywall cannot bear the weight and the rack will eventually fall. Use a reliable stud finder to locate the joists in the area where you plan to install the rack. Run the stud finder along the ceiling, marking the edges of each joist with a pencil. You’ll need at least two joists to span the width or length of your rack. If your desired mounting points don’t align perfectly with joists, you may need to adjust the rack’s position slightly or consult a professional about adding blocking.
3. Create a Template for Precision
Once you’ve identified the joists, use a large piece of cardboard or butcher paper to create a template of your pot rack. Lay the rack on the cardboard and mark the exact locations of its mounting points. Cut out this template. Now, carefully position the cardboard template against the sloped ceiling, aligning the marked mounting points with the center of the ceiling joists you previously identified. Use your pencil to accurately mark these final, corrected drill locations on the ceiling.
4. Drill Pilot Holes
With your mounting points clearly marked, select a drill bit slightly smaller than the diameter of your screw eyes or ceiling hooks. This ensures a tight, secure fit. Carefully drill pilot holes at each marked location, going directly into the center of the ceiling joists. Drill deep enough to accommodate the full length of the screw threads.
5. Install Ceiling Hooks/Screw Eyes
Now, screw the heavy-duty screw eyes or ceiling hooks into the pilot holes you just drilled. Twist them clockwise until they are fully seated and tight against the ceiling, ensuring they are securely anchored into the joists. If using lockable links, attach them to the screw eyes now before adding the chains. These links provide an added layer of safety by preventing the chains from accidentally lifting off the hooks.
6. Attach Chains to Ceiling Hooks
Attach the chains from your pot rack kit to the installed ceiling hooks or lockable links. This is where the magic happens for a sloped ceiling: you will likely need chains of different lengths to achieve a level pot rack. Start by attaching all chains and letting the rack hang. Visually assess how level it is. You’ll notice that the chains attached to the higher side of the sloped ceiling will need to be longer than those on the lower side.
7. Hang and Level the Pot Rack
Attach the pot rack frame to the dangling chains. Now, grab your spirit level or laser level. Place it on top of the pot rack and begin adjusting the chain lengths. Shorten or lengthen each chain individually until the pot rack is perfectly horizontal and stable. This might require some trial and error, adjusting one chain at a time and re-checking with the level. For fine adjustments, some chains come with quick links or adjustable S-hooks. If you need to cut chains, use sturdy wire cutters.
8. Final Touches and Safety Check
Once the pot rack is perfectly level and secure, clip off any excess chain for a clean look. Double-check all connections, ensuring that the screw eyes are tight, chains are properly attached, and any lockable links are securely closed. Finally, carefully load your pots and pans onto the rack, ensuring the weight is distributed as evenly as possible. Stand back and admire your newly organized and stylish kitchen space!
Common Challenges and Troubleshooting
Even with the best planning, you might encounter a few hurdles during installation.
- No Joists in Desired Spot: If your ideal pot rack location doesn’t have joists, do not install into drywall. Consider adjusting the rack’s position, choosing a different type of pot rack (e.g., freestanding), or consulting a professional about adding structural blocking to the ceiling.
- Rack Not Level: This is the most common issue with sloped ceilings. Simply re-adjust the length of the individual chains. Patience is key here; small adjustments can make a big difference. Use your level frequently.
- Difficulty Reaching High Ceilings: If your sloped ceiling is particularly high, ensure you have a very stable and tall ladder. Consider asking a friend to spot you or help hold the rack while you make adjustments. Safety should always be your top priority.
Expert Tips for Pot Rack Longevity and Style
To get the most out of your pot rack, consider these expert tips:
- Don’t Overload Your Rack: Always adhere to the manufacturer’s recommended weight capacity. Overloading can strain the mounting hardware and compromise safety.
- Clean Regularly: Dust and grease can accumulate. Wipe down your pot rack and cookware regularly to keep them looking their best.
- Arrange Pots Aesthetically: Think of your pot rack as a display. Hang larger, more visually appealing pots on the outside, and smaller items towards the center. Group similar items for a cohesive look.
- Consider Pot Rack Accessories: Many pot racks can be customized with additional hooks, shelves, or grids to maximize storage and functionality.
“A well-installed pot rack on a sloped ceiling is more than just storage; it’s a testament to clever design and a functional work of art. The key is understanding your ceiling’s structure and embracing the flexibility that adjustable chains provide.” – Sarah Miller, Kitchen Design Specialist
Conclusion
Installing a pot rack on a sloped ceiling might seem daunting at first, but with careful planning, the right tools, and a methodical approach, you can successfully transform your kitchen. By prioritizing secure mounting into ceiling joists and meticulously adjusting chain lengths, you can achieve a perfectly level and aesthetically pleasing storage solution. This not only declutters your cabinets and makes cooking more efficient but also adds a unique and charming design element to your kitchen. So, are you ready to elevate your kitchen’s style and functionality with a beautifully installed pot rack?
Frequently Asked Questions
Can I install a pot rack without drilling into studs?
No, it is strongly advised against installing a pot rack solely into drywall. The combined weight of the rack and cookware is too heavy for drywall anchors alone and poses a significant safety risk. Always locate and drill into ceiling joists for secure support.
How do I determine the right height for my pot rack?
The ideal height allows for comfortable access to your pots without obstructing your view or head clearance. A common guideline is to ensure the bottom of the rack is at least 6 to 6.5 feet from the floor, or high enough so that you can easily see and reach items without strain, especially if it’s over an island or stove.
What kind of weight can a ceiling-mounted pot rack hold?
The weight capacity varies significantly by the pot rack’s design and, more importantly, the strength of the mounting hardware and ceiling joist integrity. Always check the manufacturer’s specifications for the rack and ensure your screw eyes or hooks are rated for a safe margin above your total expected load.
Is it difficult to install a pot rack on a vaulted ceiling?
Installing a pot rack on a vaulted (sloped) ceiling is slightly more complex than on a flat ceiling due to the need to adjust chain lengths to achieve a level rack. However, it is not inherently difficult for a DIY enthusiast with the right tools and patience for leveling.
What if my pot rack doesn’t come with chains long enough for a sloped ceiling?
If your pot rack’s chains are too short, you can purchase additional lengths of sturdy chain and matching connectors from a hardware store. Ensure the new chain’s material and strength are compatible with your existing setup and the weight capacity required.