A pot rack over your kitchen island can transform a cluttered kitchen into a chef’s dream, offering both practical storage and a stylish focal point. But the success of this transformation hinges on one crucial factor: installing it at the proper height. Too low, and you risk head bumps and obstructed views; too high, and your prized cookware becomes an unreachable display. This comprehensive guide, informed by years of kitchen design experience, will walk you through everything you need to know to achieve the ideal pot rack height for your home.
Why Proper Pot Rack Height Matters
Setting your pot rack at the correct height isn’t just about aesthetics; it profoundly impacts your kitchen’s safety, functionality, and overall flow.
- Enhanced Safety: A pot rack that hangs too low can quickly become a hazard. Imagine reaching for a pot and bumping your head on a heavy cast-iron skillet, or obstructing pathways, creating tripping risks in a busy cooking environment. Proper clearance ensures safe movement around your island.
- Optimal Functionality and Accessibility: The primary purpose of a pot rack is to keep frequently used pots and pans within easy reach. When installed at the right height, you can effortlessly grab and replace cookware, streamlining your meal preparation and reducing strain. No more bending into low cabinets or rummaging through stacks.
- Aesthetic Harmony: A well-placed pot rack contributes significantly to your kitchen’s visual appeal. It should complement your island and ceiling height, creating a balanced look rather than overwhelming the space. An improperly hung rack can disrupt sightlines and make your kitchen feel cramped or disproportioned.
|
Our Picks for the Best Pot rack in 2026
As an Amazon Associate I earn from qualifying purchases.
|
||
| Num | Product | Action |
|---|---|---|
| 1 | MUDEELA Pots and Pans Organizer Rack for under Cabinet, Expandable 11.81''-22.85'' Pot Lid Kitchen Cabinet Organizer Holder with 10 Adjustable Compartment Cutting Board Organizer for Pan Lid, Bakeware |

|
| 2 | ORDORA Pots and Pans Organizer: under Cabinet, 20.8" Height Heavy Duty 120LBS Pots Pans Organizer Rack for under Cabinet 8-Tier Adjustable for Big Stockpots, Dutch Oven, Cast-iron Pans, Heavy Cookware |
|
| 3 | MUDEELA 8-Tier Pots and Pans Organizer under Cabinet, 15.83" Height Heavy Duty Pot Pan Organizer Kitchen Cabinet Organization and Storage, Adjustable Pot Rack for Frying Pan, Cast Iron Skillet, Black |
|
| 4 | CHOEZON Pots and Pans Organizer Rack, Kitchen Bakers Rack, Multi-Tier Storage Shelf, Kitchen Island Table, Cooking Rack with Pots and Pans Storage, Rustic Brown and Black TPR60BF |
|
| 5 | CHOEZON 31.7-Inch Hanging Pot Rack, Space-Saving Pot Hanger for Kitchen, Ceiling Pan Hanging Rack with 16 Detachable S Hooks, Sturdy Metal Frame, Industrial Style, Rustic Brown and Black TPR09BF |
|
| 6 | ORDORA Pots and Pans Organizer for Cabinet 16.61 Height, 8 Tier Pot Organizers Rack with 3 DIY Methods, Adjustable Pan Organizer under Cabinet Kitchen Organization and Storage |
|
| 7 | CHOEZON Pot Racks, 6-Tier Cookware Stand, Triangle Shelf Storage Tower for Kitchen, Pans Pots Storage Rack, Metal Wire Shelf Organizer, Corner Shelf, for Kitchen, Living Room, Black TPR15BB |
|
| 8 | MUDEELA Pots and Pans Organizer Rack under Cabinet 14.55in Height, 8-Tiers Adjustable Pot Rack with 3 DIY Methods, Pot Lid Organizer inside Cabinet for Kitchen Pantry Organization and Storage |
|
| 9 | HULISEN Pots and Pans Organizer Under Cabinet, Expandable 2-Tier Pots and Pans Lid Storage Rack Holder with 10 Dividers, Adjustable Height Under Sink Organizer, Maximize Kitchen Storage Space |
|
| 10 | VyGrow 28 Inch Pot Rack Wall Mounted, 2 Tier Pots and Pans Organizer with 20 Hooks and 6 Pot Lid Holders, Heavy Duty Steel Pot and Pan Hanger for Kitchen Cookware Utensils Storage 34.7" Lx13 Wx26.4 H |
|
Understanding Standard Pot Rack Heights
While personal preference plays a role, general guidelines provide an excellent starting point for determining your pot rack’s ideal height.
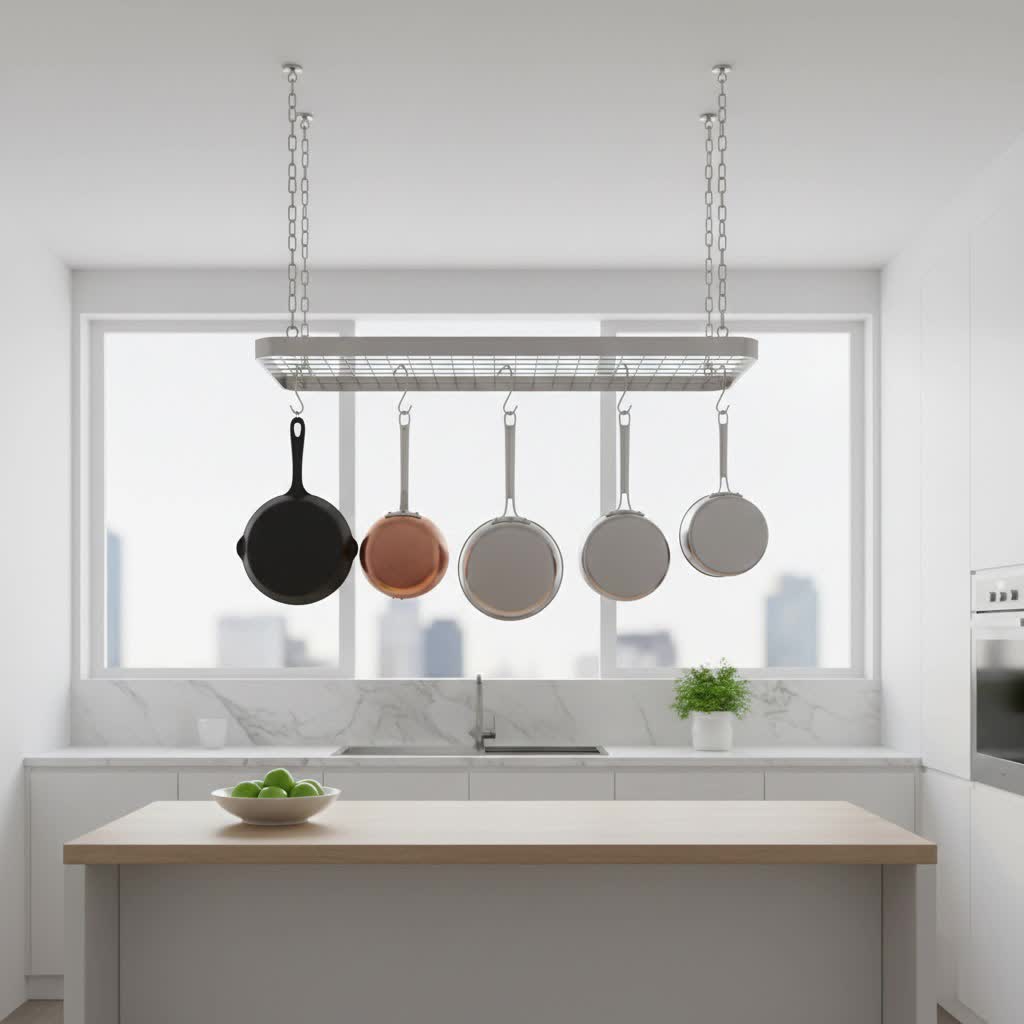
Typically, ceiling-mounted pot racks are positioned so that the top of the rack is between 7 feet (84 inches) and 7 feet 6 inches (90 inches) from the floor. Another common recommendation is to hang the rack so there’s 40 to 48 inches of clearance from the top of your island or counter surface to the bottom of the pot rack’s hooks. It’s crucial to remember that the actual pots and pans will hang below the rack itself, often adding another 6 to 8 inches to the total vertical space occupied by your cookware. You only need to comfortably reach the bottom of the hanging pan to lift it off the hook, not necessarily the hook itself. Aim for at least 30 inches of clearance above the counter for safe and comfortable use.
Key Factors Influencing Your Ideal Pot Rack Height
Many variables in your kitchen contribute to finding that perfect hanging spot. Consider these factors carefully to customize your pot rack installation.
- User Height and Reach: This is arguably the most critical factor. The rack should be high enough to avoid head bumps for the tallest person using the kitchen, yet low enough for the shortest to comfortably reach the cookware without stretching excessively. A “comfortable arms reach” is key, typically adding 6-10 inches to your standing height when your arm is extended naturally downward.
- Ceiling Height: The overall height of your ceiling dictates the type of pot rack you can install and how it should be hung.
- Standard 8-foot ceilings: May require a low-profile pot rack or one with shorter hanging chains to prevent it from hanging too low and becoming an obstruction.
- 9-foot ceilings: Are often ideal for many standard pot rack designs.
- Higher ceilings: Offer more flexibility but might necessitate longer chains or extension hooks (available in various lengths like 5″, 7″, 10″, and 15″) to bring the rack down to a manageable height.
- Island Dimensions and Location: The size and placement of your kitchen island are paramount.
- Clearance: Ensure the pot rack is centered over the island and leaves ample space for traffic around it. You should aim for at least six inches of clearance on all sides of the pot rack from the edge of the island.
- Proportionality: While you want enough storage, a pot rack shouldn’t overwhelm the island. Many suggest the rack should be reasonably smaller than the island itself, avoiding a look where it’s exactly the same size or larger.
- Cookware Size and Length: Think about the specific pots, pans, and utensils you plan to hang. Long-handled skillets, deep stockpots, and unusually shaped woks can extend significantly below the rack, affecting the lowest point of obstruction. Account for this extra vertical space when determining your rack’s bottom clearance.
- Kitchen Layout and Traffic Flow: The pot rack should enhance, not hinder, the movement within your kitchen. Install it away from high-traffic zones, doorways, and areas where people might frequently pass through. It should integrate seamlessly into your kitchen’s workflow.
- Existing Lighting and Ventilation: Ensure your pot rack does not block overhead lighting fixtures or obstruct the airflow from your range hood if your island includes a cooktop. You may need to reposition the rack, opt for a different style of lighting, or use low-profile fixtures to avoid interference.
Step-by-Step Installation: Determining Your Pot Rack’s Perfect Height
Here’s a practical guide to help you pinpoint the ideal hanging height for your pot rack.
- Measure Your Kitchen Island: Begin by measuring the height of your kitchen island from the floor to its surface. Standard island height is typically around 36 inches. Also, note its length and width to ensure your pot rack is appropriately sized and centered.
- Assess User Height and Reach: Have the primary users of the kitchen stand naturally in the spot where they would typically reach for pots over the island. Extend an arm downwards as if grabbing a pan. Measure from the floor to their comfortable “reaching height.” This measurement should be for the bottom of the pot or pan, not necessarily the hooks.
- Account for Cookware Dimensions: Consider the tallest pot or longest-handled pan you intend to hang. Measure its total length when suspended from a hook. Add this length to your desired clearance from the island surface (e.g., 40-48 inches from the island top to the bottom of your hanging pots).
- Calculate Overall Clearances:
- Above Island Clearance: Aim for 40 to 48 inches from the top of your island surface to the bottom of the hooks on the rack. Remember to add the length of your longest hanging pot to this to ensure the pot itself doesn’t obstruct vision or create a hazard. A minimum of 30 inches from the island surface to any hanging item is a good safety threshold.
- Floor Clearance: The top of the pot rack itself should ideally be around 7 feet to 7 feet 6 inches from the floor. This ensures most people can walk underneath without issues, even if pots hang lower.
- Side Clearance: For an island, allow at least six inches of clearance from the edge of the island to the nearest point of the pot rack (or hanging pot) to facilitate easy access and prevent bumping.
- Factor in Pot Rack Design: Take into account the actual height of the pot rack itself. If the rack is 18 inches high and you need 42 inches of space above the island, you’ll need to hang the top of the rack accordingly to achieve your desired bottom clearance.
- Simulate and Adjust: Before drilling, use string or painter’s tape to hang a mock-up of your pot rack (and perhaps your largest pot). Stand back, walk around, and simulate reaching for items. This visualization is crucial for fine-tuning the height for both comfort and aesthetics.
“Achieving the perfect pot rack height is a delicate balance between safety, functionality, and visual appeal. Always prioritize comfortable reach and ample clearance, then adjust for aesthetics.”
Installation Best Practices (Beyond Height)
Once you’ve determined the ideal height, proper installation techniques are essential for safety and durability.
- Locating Ceiling Joists: Pot racks must be mounted into solid wood, typically ceiling joists, to safely support the considerable weight of cookware. Use a stud finder to accurately locate these joists. If your rack’s mounting points don’t align with perpendicular joists, a ceiling plate with eye bolts can be used to span the gap and ensure a secure mount.
- Use Appropriate Hardware: Always use heavy-duty lag screws or toggle anchors that are rated for the combined weight of your pot rack and all the cookware it will hold. As a safety measure, calculate your total cookware weight and add at least a 50% safety margin to determine the required capacity.
- Avoid Obstructions: Double-check that the installed pot rack and hanging pots won’t interfere with existing ceiling lights, pendant fixtures, or the functionality of your kitchen’s ventilation system. Ensure it doesn’t obstruct views, either into other rooms or across your kitchen.
- Tools for the Job: Gather essential tools such as a stud finder, drill with appropriate bits, tape measure, level, and safety glasses before you begin.
Conclusion
Installing a pot rack above your kitchen island is a fantastic way to maximize space and bring your cookware into the heart of your culinary activities. By meticulously considering factors like user height, ceiling dimensions, and cookware size, and adhering to recommended clearance guidelines, you can ensure your pot rack is not only beautiful but also perfectly functional and safe. Taking the time to measure, plan, and even visualize the installation will lead to a pot rack that serves you well for years to come. What kind of impact do you think a well-placed pot rack could have on your daily cooking routine?
Frequently Asked Questions
What is the ideal distance from the kitchen island surface to the bottom of the pot rack?
A good rule of thumb is to allow 40 to 48 inches from the top of your island surface to the bottom of the pot rack’s hooks. This provides comfortable access while preventing obstruction. Remember to also account for the length of your hanging pots below the rack.
How do I ensure the pot rack is at a comfortable height for everyone in my household?
Consider the height of the tallest and shortest regular users. The rack should be high enough so the tallest person doesn’t bump their head, but low enough for the shortest to reach pots comfortably without excessive stretching. Simulation with string or a mock-up can help find a good compromise.
Can I install a pot rack if I have a low ceiling?
Yes, you can. For ceilings around 8 feet, look for low-profile pot racks specifically designed to hang closer to the ceiling. You might also choose a rack that uses shorter chains or direct mounts to maximize clearance from the floor and island surface.
How much space should I leave around the pot rack over my island?
It’s recommended to leave at least six inches of clearance on all sides of the pot rack from the edge of your kitchen island. This allows for easy access to your cookware and prevents accidental bumps when moving around the island.
What should I do if my pot rack interferes with my kitchen lighting?
If your pot rack obstructs existing lighting, consider repositioning the rack slightly if feasible. Alternatively, replace the current light fixtures with low-profile options, or incorporate task lighting directly within or around the pot rack design to ensure adequate illumination.
How do I calculate the weight capacity needed for my pot rack?
Weigh all the pots and pans you intend to hang. Then, add a safety margin of at least 50% to that total. This combined weight will be the minimum capacity your pot rack and its mounting hardware must be rated to support.
Is it okay for the pot rack to be wider than the kitchen island?
Generally, it is best for the pot rack to be equal to or smaller than the width of your kitchen island. A rack that is wider can look disproportionate and make it harder to access cookware without reaching over the counter, potentially causing an obstruction.